
Predefined groups; the ALL group
Predefined groups; the ALL group
The Predefined groups section is on the left at the top of the main Message Express interface; a group named All appears when the interface is open.
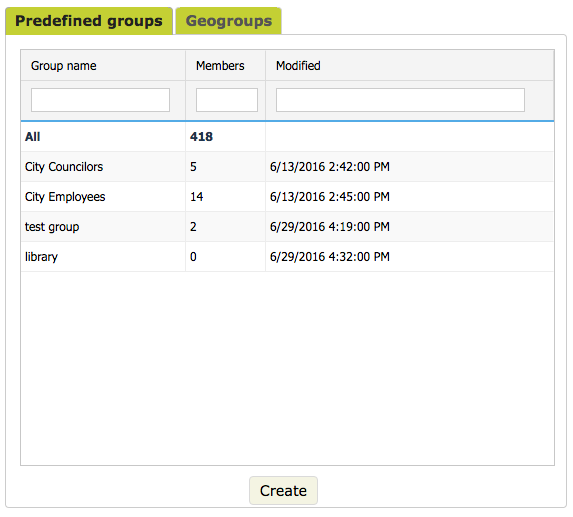
The All group cannot be deleted by a user. Its content actually corresponds to all the contacts in your circuit and thus updates itself as new entries are made. It is different from other groups since the only way to change its content is to Add a user or to delete one. It allows you to select all the contacts in your system when sending messages.
To unselect this group (as for all others), click it again when it is highlighted in green. If the All group is selected, you cannot select another one simultaneously. Only one group can be selected at a time.
Now let’s see how to create groups.
Creating a group
By clicking on the Create button, a group is created; you must give it a name before saving it.
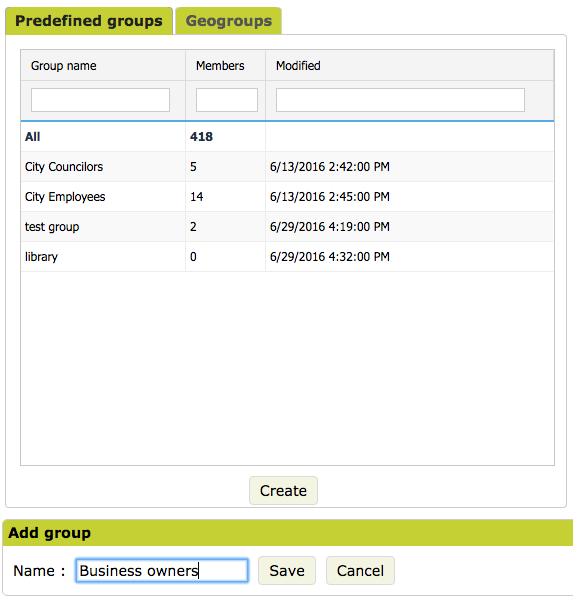
Once created, you can add contacts to the group. To do so, click the Modify button.
Modifying a group
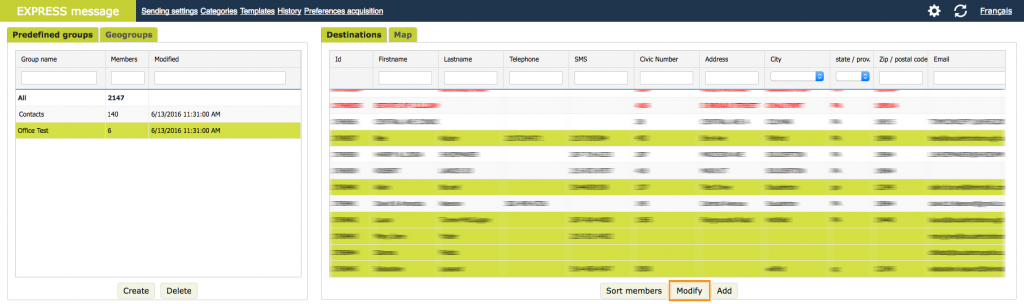
As seen below, the Modify button is absent if no selection is made within the Predefined groups.

This button is also absent if the All group is selected, as it can only be modified by adding or deleting a contact, or when a citizen registers via the widget.
The Modify button appears (and becomes clickable) when a group is selected, i.e. it will be highlighted in green.
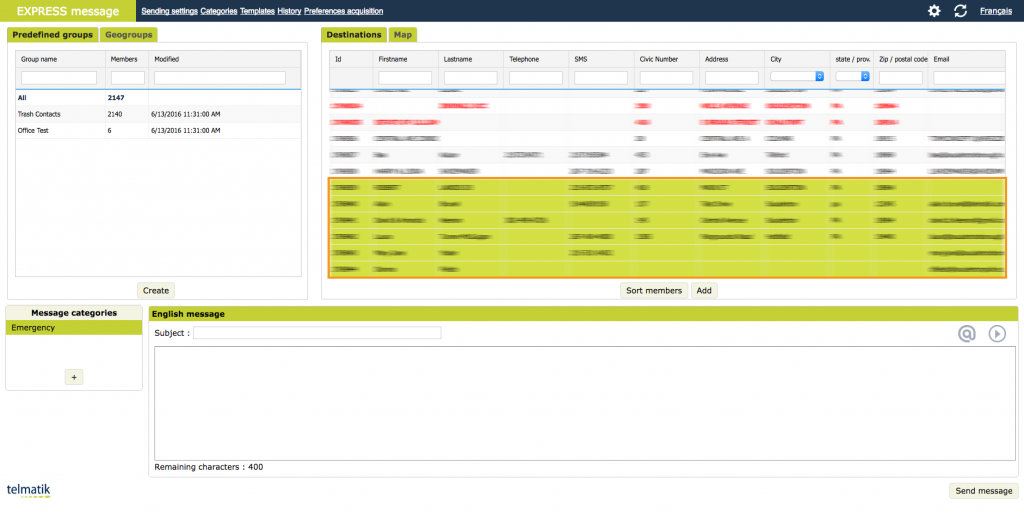
When a group is selected and Modify is clicked, this button is replaced by Cancel and Save. In addition, the composition of the group changes to orange. This way, you can easily add new contacts (in green) and identify them at a glance.

To add or remove contacts from a group, you must:
- Click on the name of the group whose contact list you wish to modify. Instantly, the contacts included in this list will appear on the right, highlighted in green.
- Click on the Modify* button located under the Recipients cell to switch to editing mode for this group's list. You can deselect them by clicking on them one by one to remove them. You can also select other contacts who are not in the group and add them.
- To confirm the change, click on Save. If you do not want to apply the change anymore, you can click on Cancel.
*After choosing a group by clicking on its name, if you do not click on the Edit button, you can make a spontaneous selection from the list of contacts in this group (you can add or delete contacts). The selected group will then deselect itself. The following section discusses this contact selection method in more details.
Spontaneous selection of recipients
Message Express allows you to send a communication to selected contacts from the Destinations (recipients) grid without having to create a group. This is useful when you only want to send one message to a specific list of people. You can even send a message to one contact at a time if you wish.
Whether you want to test a message before sending it massively (to ensure its quality) or to share the experience of sending it to your colleagues or invite them to an event, the spontaneous selection is quick and useful.
- If you click on a contact not selected in the grid, it will turn green and be ready to receive your message. The other green contacts in the list will not be affected by this action if you press the control key (CTRL) with a PC / Command (CMD) with a Mac when selecting a new contact.
- If you click on an already selected contact, it will deselect itself. The other green contacts in the list will not be affected by this action if you press the Control key (CTRL) with a PC / Command (CMD) with a Mac when deselecting a contact.
- You can also select several contacts at the same time if they appear one after the other in the list. Holding down the Shift key on the keyboard, click on the first and last contacts, and these two contacts, and all those in between, will be selected. Note that if any contacts in this selection were already green, they will remain green.
To save time, you may also start from an existing group to perform a spontaneous selection. To do this, simply choose a group amongst the predefined groups on the left; the recipients in the selected group will appear highlighted in green. You can then change the selection (without first pressing the Modify button). By doing so, the group’s name will be deselected and will go into spontaneous selection mode.
There are two things to keep in mind here:
1- When making a spontaneous selection of contacts, do not select a group in the list on the left at the same time, as the members of that group will automatically appear in the Recipients cell (highlighted in green). In other words, if you select a group while making a spontaneous selection, you will lose your spontaneous selection.
2- You cannot make a spontaneous selection and then convert it into a predefined group. You must remember that to create a predefined group, you must first create a group and then modify it.
Note that spontaneous selection is ideal for sending a message based, for example, on a street name or a family name, etc. The top of the columns in the Recipients grid allows you to filter and sort lists as we will see in the next section.
Filtering and sorting columns in the Destinations (recipients) grid
In the Recipients grid, you can easily filter and sort the content of the columns.
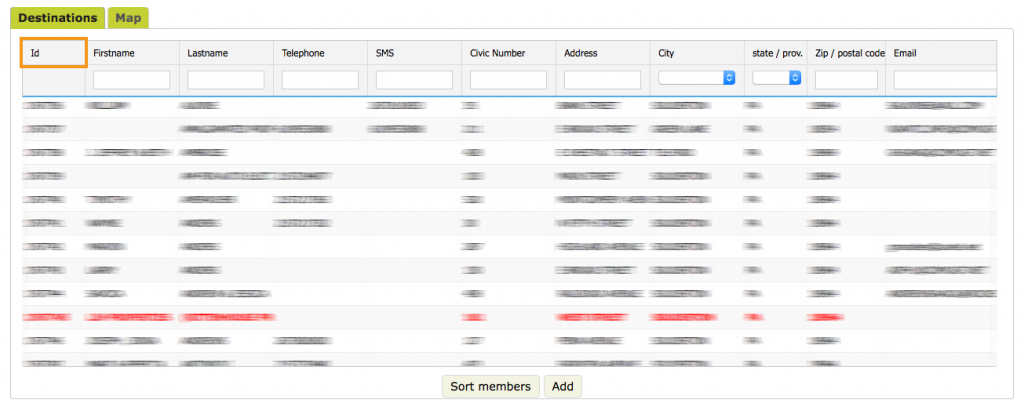
By default, the contacts in Message Express are listed in an ascending order of identification (id) number. This is the first column on the left, as seen below. Although the id number refers to the Message Express database, it also represents the chronological order in which contacts were added or registered via the widget, with the most recent contact at the bottom of the list.
However, you can click on the name at the top of the other columns to display the contacts in a different order as seen below.

We notice in this image that the contacts are presented in alphabetical order (by first name). To do this, click once on the column header: First Name.
Clicking twice rather than once on the column header switches from ascending to descending order. Remember to look at the arrow next to the header of the selected column; the arrow points downwards when the descending order has been applied, and upwards when the ascending order has been applied.

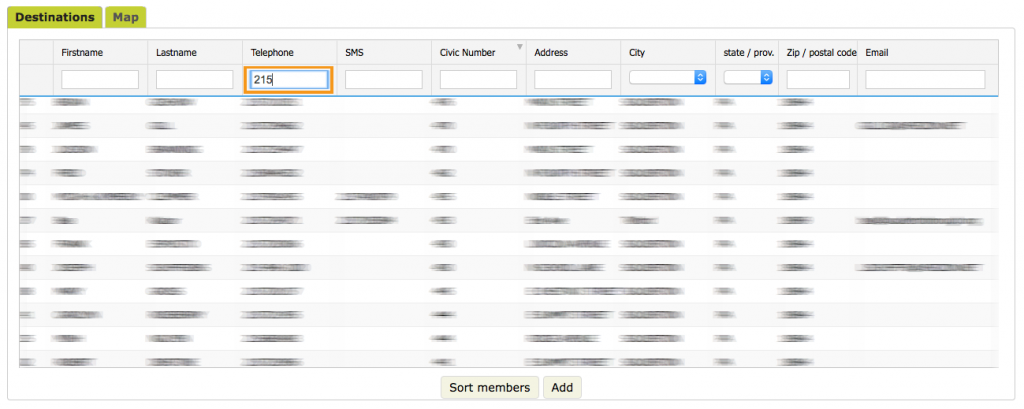
Most columns have an input field just below their name to enter text and filter the contacts. For example, you could filter the list to have only a specific area code, as seen below.
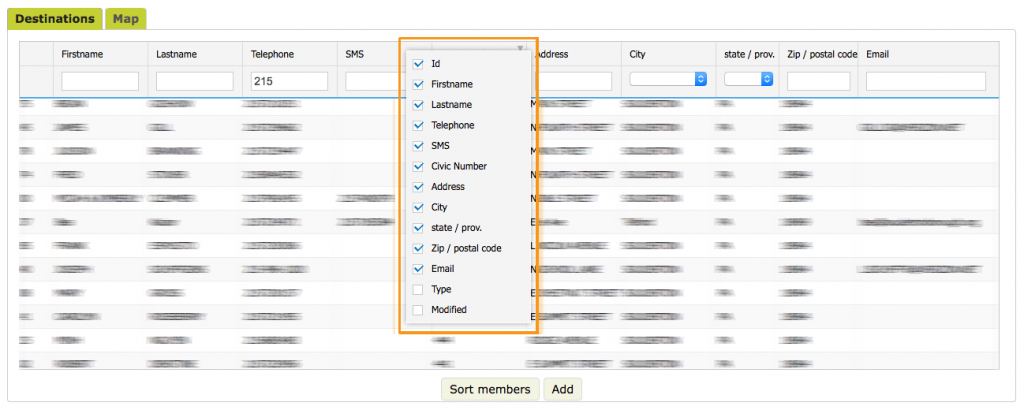
If a column seems unnecessary, you can hide it. On a PC, right-click next to a column header. On a Mac, press the control key (CTRL) while clicking. This will display a list of all the columns and you can uncheck certain columns as required, as in the image below.
As it is possible to filter and sort the contacts in each column of the Recipients grid, you can fine-tune a selection or even the composition of a group.
But what is the Sort members button for?